Last Updated on October 6, 2026
First, which question are you asking? “Remove stain from wood” means two completely different jobs, and the wrong method wastes an afternoon:
- A mark on the wood – a white ring from a mug, a black patch under an old hinge, ink, grease. You want the mark gone and the rest of the finish left alone.
- The wood stain itself – the color someone applied on purpose, which you now want off so you can go lighter or paint it.
Both ways to remove stain from wood are below. Marks first, because that is the one where most advice online sends people straight to the sandpaper when sanding is often the one thing that will not work.
How to remove a stain from wood: marks first
First find out whether it is in the finish or in the wood
This single test decides everything. Press a fingernail into the edge of the mark, somewhere inconspicuous.
If the mark sits in the finish – typical of white rings and cloudy heat marks – it is moisture trapped in the lacquer or wax, not damage to the timber. It comes out without touching the wood at all.
If the mark is in the wood – typical of black patches, ink and deep water staining – the finish above it is clear and the color is underneath. Polishing the surface will do nothing. You have to get the finish off first, then treat the timber.

White rings and cloudy marks
Trapped moisture, and the fix is to drive it back out with gentle heat. Lay a cotton cloth over the ring and press a warm iron on it – no steam – for a few seconds at a time, checking between each go. A hairdryer held a few inches away works too, and is harder to overdo.
If heat alone does not shift it, a mild abrasive in oil will: a little non-gel toothpaste, or bicarbonate of soda mixed with olive oil, rubbed along the grain with a soft cloth. You are polishing the top of the finish, so work lightly and stop as soon as the cloudiness goes.
Black and gray stains
This is the one that defeats people, because it is not dirt and it is not the finish. Black or blue-black marks around old nails, hinges and screw holes – and the gray on weathered oak – are iron reacting with the tannin in the wood in the presence of moisture. The result is iron tannate, and it is a chemical change in the timber itself.
Sanding will not reach it: it often goes several millimeters deep, and you will change the shape of the piece before you reach clean wood. Household bleach does nothing to it either, because it is the wrong kind of bleach.
Oxalic acid is the answer, and it is specific to this stain. It breaks the colored iron-tannin complex apart into colorless fragments, which is why it lifts black water stains that nothing else touches (the chemistry of oxalic acid wood bleaching, Wood Work Science). It is sold as “wood bleach” crystals. If the black is around old fixings you are replacing anyway, fill the holes afterwards – see our wood filler review.
Strip the finish off first – oxalic acid cannot get through lacquer. Dissolve the crystals in warm water to a saturated solution, brush it over the whole surface rather than just the mark, and let it dry. Repeat if the stain is still visible. Then neutralize, because acid left in the timber will interfere with your new finish and can corrode fixings later.
Wear gloves and eye protection, and keep it off skin. A proper respirator matters once you start sanding the dried residue. It raises the grain, so a light sand comes after it, not before.
Ink, grease and dye marks
Work up in strength rather than starting at the top. dish soap in warm water first. Then mineral spirits on a cloth for grease and wax. Then denatured alcohol or isopropyl alcohol for ink and dye – test it somewhere hidden, because it dissolves shellac and some lacquers along with the mark.
If the mark is in the wood rather than the finish, none of these will reach it and you are back to stripping and bleaching.
The three wood bleaches, and what each one actually does
Half the frustration around stained wood comes from “wood bleach” meaning three unrelated chemicals. They are not interchangeable, and using the wrong one is why people sand for hours and the mark stays exactly where it was.
| Bleach | Removes | Will not touch |
|---|---|---|
| Oxalic acid (sold as wood bleach crystals) |
Black and gray iron stains, water marks, weathering gray | Dyes, pigment stain, the wood’s own color |
| Chlorine bleach (household bleach or pool chlorine) |
Dye color – spilled ink, food dye, some wood stains | Iron stains, and the natural color of the timber |
| Two-part A/B bleach (sodium hydroxide then hydrogen peroxide) |
The wood’s own natural color – takes oak or walnut pale | Iron stains, which it can actually darken |
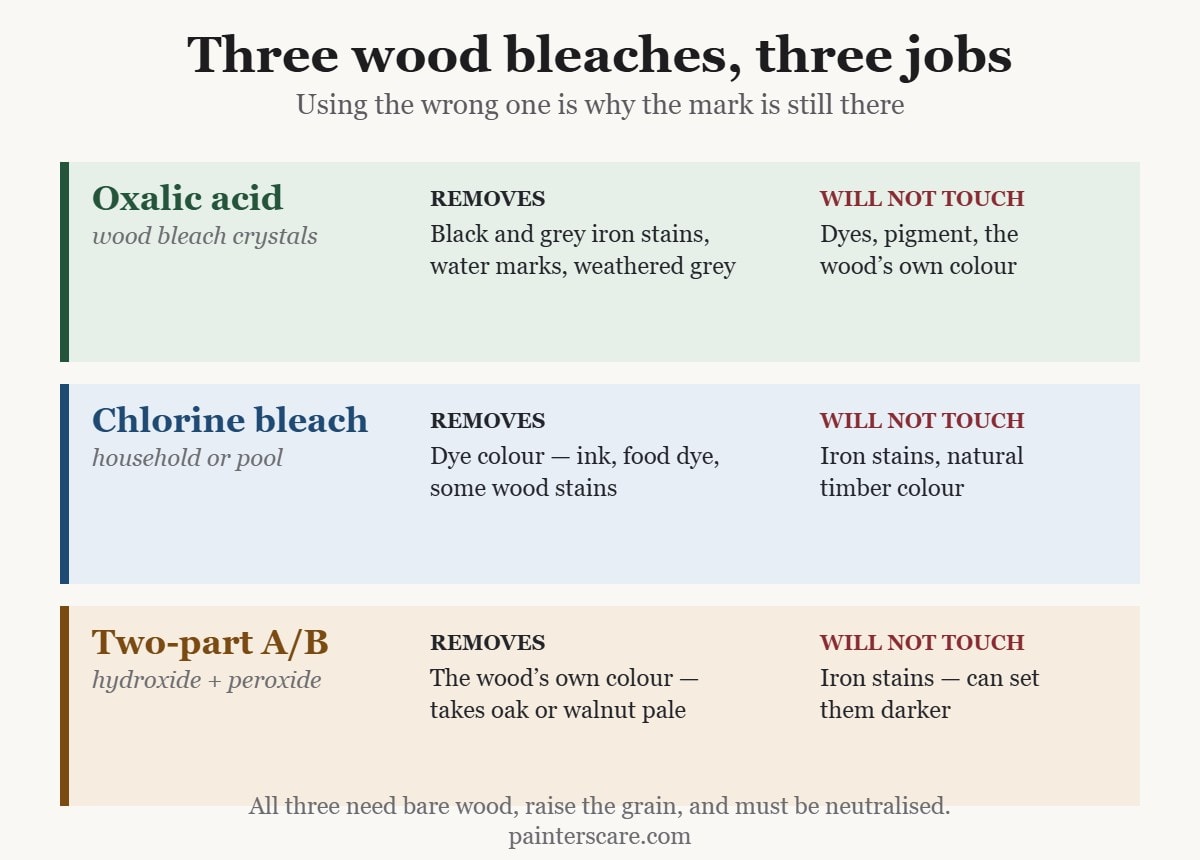
So: black ring under a plant pot is oxalic. Biro on a pine table is chlorine. Wanting a dark oak dresser to end up blonde is two-part. Reaching for the wrong bottle is not a small mistake – two-part bleach on an iron stain can set it darker.
All three want bare wood, all three raise the grain, and all three need neutralizing and full drying before you put a finish on.
Removing the wood stain itself
If what you want off is the color someone applied deliberately, this is a stripping job rather than a cleaning one.
The honest limitation first: stain soaks into the timber, so it does not all come off. A stripper takes the finish and most of the pigment sitting in the top layer, but dye that has traveled into the grain stays. You can usually get several shades lighter. Going from dark walnut to raw pale timber often needs two-part bleach after stripping, and sometimes does not happen at all on open-grained wood.
The method:
- Take the hardware off and bag it, labeled. Work in ventilation with a drop sheet down.
- Clean the surface with sugar soap or mild detergent and let it dry. Stripper does not work through grease and wax.
- Brush on a thick coat of stripper and cover it with plastic wrap so it stays wet. Thin coats that dry out are the main reason this fails.
- Leave it properly – anything from thirty minutes to overnight depending on the product. Test a corner rather than watching the clock.
- Scrape with the grain, plastic blade on anything delicate, and get into moldings with fine steel wool or a nylon brush.
- Wash off the residue as the can directs and let the piece dry for a day or two. Wood that feels dry on the surface is often not.
- Sand at 150, then 180 or 220, always along the grain. This is where the last of the surface pigment goes.
- Bleach only if you need to go lighter still, using the table above to pick the right one.

Choosing a product and understanding why modern strippers are slower than they used to be is covered in our guide to removing paint and finishes from wood.
Sand or strip to remove stain from wood?
A heat gun is a third option on flat runs, though it works better on paint than on stain. Strip when the piece has moldings, carving, veneer or any shape you care about keeping. Sanding rounds over crisp edges, and on veneer it goes through to the substrate faster than you expect – often under a millimeter.
Sand when the surface is flat, solid timber, and the finish is thin. A table top with one coat of varnish is quicker to sand than to strip.

Most jobs are both: strip to remove the bulk, sand to even out what is left.
If you are refinishing rather than repainting, a sprayer suited to furniture gives a far more even coat on bare wood than a brush will.
Frequently asked questions
Is it better to sand or strip stained wood?
Strip anything with moldings, carving or veneer – sanding rounds over detail and cuts through veneer in under a millimeter. Sand when the surface is flat solid timber with a thin finish. Most real jobs use both: strip for the bulk, sand to even up what is left.
Can wood stain be removed without sanding?
Mostly. A chemical stripper lifts the finish and the surface pigment with no abrasive at all. What it will not do is reach dye that has soaked into the grain, so expect to go several shades lighter rather than back to raw timber, and expect a light sand at the end regardless.
Can you remove a stain after it has dried?
Yes, but the method depends on what it is. Trapped moisture marks come out with gentle heat whenever you get to them. Iron and tannin black stains need oxalic acid no matter how old they are. Dye and ink get harder with age as they travel deeper into the wood.
What will remove a set-in stain on wood?
Work out what it is first. Black or gray means iron, which means oxalic acid. A white or cloudy ring means trapped moisture, which means heat. A colored mark means dye, which means chlorine bleach on bare wood. Sanding is the answer to almost none of them.
Does Dawn and vinegar remove stains from wood?
Detergent shifts grease and general grime, and vinegar cuts light residue. Neither removes a stain that has penetrated the wood, and vinegar left on bare timber can darken oak by reacting with its tannin – the same reaction that caused the black mark you might be trying to remove.
Will baking soda remove stains from wood?
Mixed with oil into a paste it works as a very mild abrasive polish, which is genuinely useful on white heat marks sitting in the finish. It does nothing to anything in the timber itself, despite how often it is suggested.
How do you get black water stains out of oak?
Oxalic acid. The black is iron tannate, formed where iron and water met the tannin in the oak, and it is a chemical change in the wood rather than dirt on it. Strip the finish, apply a saturated oxalic solution across the whole surface so the color stays even, repeat if needed, then neutralize and let it dry fully.
Does vinegar remove wood stain?
No. Vinegar is sometimes used to create a stain – steel wool steeped in vinegar is a traditional way to ebonize oak. Using it to remove one works against you.
Do you need to neutralize wood after using bleach or oxalic acid?
Yes. Residue left in the timber stops a finish curing properly and can corrode screws and hinges over time. Follow the product instruction – usually a water rinse, sometimes a mild alkaline wash after an acid. Then let the piece dry for a day or two before sanding.
Why is my wood blotchy after stripping the stain?
Because stain penetrates unevenly. Softer areas of grain, end grain and any part that was previously sanded more take the color deeper, so they hold it longer when you strip. Even it up with two-part bleach, or accept it and choose a new color dark enough to cover the variation.
